Wednesday, April 28, 2010

Restart a PC via Remote desktop


How to restart your computer via remote desktop? There are couple of ways you can do this
1. Alt+F4 is one of the easiest ways you can do it. Then select the Restart.
2. Ctr+Alt+End and the select the Restart
3. Start > Run > then type shutdown.exe

Sunday, April 25, 2010

Team Viewer


TeamViewer connects to any PC or server around the world within a few seconds. You can remote control your partner's PC as if you were sitting right in front of it.
Click here to download Team Viewer4.0

Saturday, April 24, 2010

Using AnalogX Proxy to share an Internet Connection in a network


Are you're using Internet Connection Sharing, but not satisfied with the results? You may try AnalogX Proxy server. It is very compact and easy to use. AnalogX Proxy is a small and simple server that allows any other machine on your local network to route it's requests through a central machine. Run Proxy on the machine with the internet connection and configure the other machines to use the Proxy Server. Supports all Windows Operating Systems.
In System having direct internet connection (USB connection)
Download AnalogX Proxy and install it.
Open Network Connections folder
Right-click the LAN connection, choose Properties
Select Internet Protocol (TCP/IP) from the list
Choose Properties.
Notedown the IP address
Click OK, then Close.
In the Client computers
Click Start, Run and type CONTROL INETCPL.CPL
Choose Connections tab and click LAN Settings
In the Proxy Server section, type in IP address of the host computer(i.e You have note downed).
Mention 6588 as the Port Number (for http)
Click OK, OK and close the dialogs.
AnalogX notifies you that the Proxy is in open mode, the first time when you use it. You need to change it to closed mode so that only your local network accesses this Proxy server.
Click here to download Analogx proxyi

ADSL 2+ MODEM DRIVERS


The usb modem drivers for the adsl 2+ modems is available in the following link.
Click here to download USB Modem Drivers

Sunday, April 18, 2010

Set a program to run automatically (autorun)


Using autorun, you can set a program to start up automatically when you connect the pen drive to a computer. You can also use the same script for a data CD-ROM. Note that some computers have autorun disabled for security purposes.
Open up notepad and paste the following script:
[autorun]
ShellExecute=filename
Label=description
UseAutoPlay=1

Make sure you replace filename with the full path to the file. For example, a file called program.exe in a folder called “programs” on the thumb drive would be /programs/program.exe
Replace description with a short description of the program, for example, My Jukebox or Mozilla Firefox.
Save the file as autorun.inf, making sure you select “All Programs” from the save menu, not “Text document”!

Saturday, April 17, 2010

Windows XP Universal Ethernet Drivers


You can download here Universal LAN drivers which are compactable to most of network cards.
Click here to download Universal XP Lan Drivers

Zback 2.00.0


Zback is a backup and synchronize tool with a small footprint. Copy modes include update files, refresh existing files, or mirror source to target and can be run manually, from batch/script, or from the command line. Users can filter files based on extension, size, date, subdirectories and preview their backup/sync before running.
Click here to download Zback

Thursday, April 15, 2010

How to disable Open File Security Warning when running applications?


Run gpedit.msc, and go to Local Computer Policy->User
Configuration->Administrative Templates->Windows
Components->Attachment Manager and enable "Default risk level for file attachments", and then enable "Inclusion list for low risk file types" and add to this list the file extensions that you want to open without triggering this crap.

Wednesday, April 14, 2010

DataRecovery


DataRecovery is freeware and written by TOKIWA to undelete accidentally deleted files even from recycle bin. But DataRecovery doesn't assure that all files deleted can be recovered successfully.
Click here to download DataRecovery

HP USB Disk Storage Format Tool


This utility will format any USB flash drive, with your choice of FAT, FAT32, or NTFS partition types.
Click here to download USB Formatter

DBF Viewer Plus


DBF Viewer Plus is a portable DBF table viewer plus some additional features for editing and searching.
Click here to download DBF Viewer

Sunday, April 11, 2010

USB Disk Security


USB Disk Security provides protection against any threats via USB drive. USB Disk Security is the best antivirus software to permanently protect offline computer without the need for signature updates, but other antivirus software should update signature database regularly, and they cannot effectively protect offline computer. This light and easy to use solution is 100% compatible with all software and doesn't slow down your computer at all. You pay USB Disk Security once and get it all, however, other antivirus products should be paid for updates every year.
Click here to download USB Disk Security

Aespe Table Browser for MS SQL Server


Aespe Table Browser for MS SQL Server provides a simplified way to browse MS SQL database tables without having to use any SQL syntax to sort the columns or to perform basic filtering. The program lists the tables in a Windows Explorer style tree view to the left and selecting one will open the first 100 rows (can be changed). The right click column for each row offers additional copy options that lets you copy the row content in different formats. Additional features include several query helpers to filter the output and search for specific row content as well as an option to run SQL queries.
Click here to download Aespe Table Browser

PDF to Word Converter


Free PDF to Word is a portable tool that can be used to convert PDF files to DOC (Microsoft Word Document) or RTF (Rich Text Format). Free PDF to Word also preserves the format when performing the DOC or RTF conversion and can convert encrypted PDF files as well. The application is stand alone and does not require adobe software be installed to run.
How to make Free PDF to Word:
Download the Portable PDF Converter HERE
Install the software to your PC as usual
Copy the C:\Program Files\Free PDF to Word Converter folder to your USB device
Click PDF2Word.exe to launch the program
Click here to download PDF to Word Converter

DriverBackup


DriverBackup is a nice driver backup tool that allows a user to create a backup of his or her hardware driver files. DriverBackup preserves drivers of your hardware peripherals by saving them into a user specified location. You can then quickly reinstall your system hardware drivers if need be from the saved location. This tool uses 212KB of disk space once extracted making it ideal for portable usage.
Click here to download driver backup

Disk Wipe


Disk Wipe is a Portable Disk Wiper that can be used to permanently remove data from hard drives, flash cards, USB drives, mp3 players, cameras and other storage devices. The tool provides secure permanent data destruction by deleting all information from the storage device, making it virtually impossible to perform data retrieval. Disk Wipe supports devices the utilize a NTFS, Fat, or Fat32 file format.
Click here to download DiskWipe

Portable CD/DVD burning tool


CDBurnerXP is a CD DVD Blu-Ray Burning Software. It can be used to burn CDs and DVDs, including Blu-Ray and HD-DVDs. The CD DVD Burning Tool offers features commonly found in purchased CD/DVD/Blu-Ray Recording Software. Examples include: Ability to burn and create ISOs, compile your own audio disks or data disks, Bin – Nrg to ISO converter, Create bootable CD's and much more. CDBurner Portable is available in a stand alone version, enabling you to store and run the tool from a USB device.
Click here to download CDBurnerXP

Partition Manager


EASEUS Partition Manager Home Edition is a free comprehensive hard disk partition management software to allows users to perform all the powerful functions relation to volume partitioning such as resize and move partitions, copy partition, copy disk, create, delete and format partitions, hide and unhide partitions and much more.
Main features of EASEUS Partition Manager Home Edition include:
Resize/Move partitions without losing data.
Disk Copy, Partition Copy to protect data.
Create and delete partitions with simple step.
Hide and Unhide partitions.
Format partitions.
Click here to download Partition Manager

Record your computer screen


Camstudio is a software which is useful to record computers screen when you are working.
Click here to download Camstudio

Working with PLI WAN Website in windows Vista and Internet Explorer 8


Now PLI website working in Windows Vista and Internet Explorer 8.Please download dll file from the following link and go through readme file.
Click here to install java oracle initiator
Click here to download Patch for Vista

Windows Service Packs


Service packs are the means by which product updates are distributed. Service packs may contain updates for system reliability, program compatibility, security, and more.
Click here to download Hotfix for Windows server 2003
Click here to download Vista ServicePack2
Click here to download XP ServicePack3
Click here to download Windows Server 2003 ServicePack2

Saturday, April 10, 2010

DB Tools


DB Tools is a small software which can help you to take backup,shrink,log clearing of SQL databases.Please download DB Tools from the following link and unzip ocx files. Paste all ocx files to C:\Windows\System32 and register all ocx files using RegisterOCX.bat.Then double click on DB Tolls.exe and save SQL Server and sa passward information.Then start to use DB Tools.
Click here to download DB Tools

Easy process for booking hardware compalint to HP


01. Open website www.itrc.hp.com
02. For first time u have create one user name and password by clicking register button on left side.
03. Login with ur user name and password
04. In the options select support case manager.
05. Enter Product no (ex: NA*****) and sl no of CPU (EX: INA*******)
06. Click on next
07. If ur cpu exist in warranty it wil ask ur contact address and problem description.
08. Enter the details of the hard ware which have problem ( for example if keyboard not working enter the model of the keyboard i.e ps/2 or usb)
09. After completion click on submit to generate the case id.
with the above case id u can know the status of ur complaint.

Speeding Up : WinXP’s Shutdown


It’s not only start-up that you’d like to speed up; you can also make sure that your system shuts down faster. If shutting down XP takes what seems to be an inordinate amount of time, here are a couple of steps you can take to speed up the shutdown process:
Don’t have XP clear your paging file at shutdown. For security reasons, you can have XP clear your paging file (pagefile.sys) of its contents whenever you shut down. Your paging file is used to store temporary files and data, but when your system shuts down, information stays in the file. Some people prefer to have the paging file cleared at shutdown because sensitive information such as unencrypted passwords sometimes ends up in the file. However, clearing the paging file can slow shutdown times significantly, so if extreme security isn’t a high priority, you might not want to clear it. To shut down XP without clearing your paging file, run the Registry Editor (click Start > Run, then type regedit in the Run box) and go to:
HKEY_LOCAL_MACHINE\SYSTEM\CurrentControlSet\Control\Session Manager\Memory Management
Change the value of ClearPageFileAtShutdown to 0. Close the Registry, and restart your computer. Whenever you turn off XP from now on, the paging file won’t be cleared, and you should be able to shut down more quickly.
Note: Please be careful when editing the Registry; you can do a lot of damage here. Don’t change or delete anything unless you know exactly what it is.

Tuesday, April 6, 2010

What is new in Windows XP SP3


Click here to download SP3 of Windows XP
Some of the new features found in Windows XP SP3 are:
Network Access Protection compatibility (NAP). Announced a while back, this feature enables Windows XP computers to leverage the NAP feature in Windows Server 2008. This is also found in Windows Vista. From a compliance perspective this is a big win, as this element enables users to better protect their network by evaluating the connected system’s heath status, for example, the antivirus pattern level and the patch level of the respective machine. If the computer at time of connection complies with the prerequisite policy element then the machine is allowed network access, if the policy is not met then the machine is quarantined to a network segment, which has limited access to resources. This limited access allows for the machine to be updated to an acceptable level before being scanned again and approved to be used on the production network.From a remote access perspective this feature is useful as travelling users are known to be in “promiscuous mode”, meaning they will connect to any network or computer that they may come across during their time away from the office. This in turn may leave the computer exposed and the vulnerability could be exploited or malware could slip past the antivirus defences. This would potentially lead to a compromise and result in unauthorised access or the malicious software could propagate once the remote user connects. The quarantine option scans and verifies that the computer is protected and set to an acceptable level before being allowed access through to the remote environment. This is a long awaited feature and is welcome in many circles.
Product Key-less install option. As with Windows Vista, XP SP3 installs can proceed without entering a product key during setup. But keep your product key handy as thirty days later you will have to enter the key in or your operating system will be reduced to a limited mode version.
Kernel Mode Cryptographic Module. This feature is a kernel module that "encapsulates several different cryptographic algorithms," not quite sure what that entails but I am sure this feature is going to be used to better enhance how XP handles crypto requests at the application layer. More encryption, more protection, as long as the keys are secure. I look forward to this feature and am interested in how vendors will leverage this.
"Black hole" router detection algorithm. This feature enables the XP client to identify routers that drop packets. This is a backported feature found in Windows Vista.
Simple Policy Update for Windows XP: A welcome feature that helps make things easier when it comes to the mysterious topic of XP IPSec; the creation and maintenance of IPSec filters. The simplification of this feature makes it a lot easier to rollout IPSec for domain and network communication.
Digital Identity Management Service (DIMS): This feature enables the users logged into any domain based computer to seamlessly access their certificates and private keys for applications and services.
Wi-Fi Protected Access 2 (WPA2): This feature adds support for WPA2, or IEEE 802.11i standard. More security for wireless communication is a true relief as natively XP lacked the ability to do this without a third party component. From a security perspective this is a welcome change. I am not sure how many organizations will implement this technology just yet as previously it has suffered from complex design.
1,073 fixes are part of this update. These updates upgrade Windows XP to the very latest version including all the hardware support and software upgrades that are not included in Windows update. A common question is: do I need to install service pack 1 and 2 before installing service pack 3; the simple answer is no, service pack 3 already contains the updates and features of service pack 1 and 2.
Performance After installing it was found that the performances on the laptop improved by 16%. Figures have been reported in the industry of up-to 25% but this still needs to be clarified. The official figures are closer to 10%.

Sunday, April 4, 2010

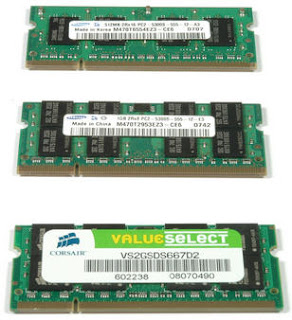
Trouble Shooting on RAM -Some Tips


It's rare but RAM modules can cause problems. Unfortunately, it's not always certain that the memory errors being reported by your system is actually due to problems with the RAM modules. Even worse is that an unstable system can be due to many problems including RAM failure.
Step 1: Back up all important files and data. You should be doing this on a regular basis anyway but if your computer is showing signs of failure don't wait any longer to perform this job.
Step 2: Start simple and analyze the problem.
* Have you added or replaced RAM? Is it installed properly?
* Have you moved the computer? RAM modules can come loose.
* Is it a new computer? RAM modules might not have been inserted properly.
* Have you installed any new hardware upgrades?
* Have you installed new software or might there be a virus problem?
* Have you changed or installed patches for your operating system?
* Do you have the correct RAM type?
* Is the RAM module connectors tin or gold?
* When your computer starts (boots) does it report the correct amount of RAM?
* Does your system properties report the correct amount of RAM?
* Are there any POST messages that indicate RAM problems?
* Does the system report Parity errors or address failures whilst the system is
running?
* Do you get a Windows error message "exception error OE at>>0137:BFF9z5d0" or something similar?
* You've tried everything else!!!
Any one of these can indicate a problem with the RAM module or something connected with it.
WARNING:Before you start troubleshooting remember that you are
dealing with electricity that can KILL. Only work inside the computer case when the power has been switched off and disconnected. Never open the power source.
Step 3: Start by reading through this article to establish some
ideas about what the problem might be and how to resolve it. There is no absolute order for diagnosing problems it's equal parts science and magic. If it's hardware then you are probably going to have to open the computer case (steps 5 - 10 & 13). You may prefer to eliminate other problems first (steps 11-12). Or even run
diagnostic software (step 14)
Step 4: Gather all the documentation that came with your computer, memory modules or MOBO (motherboard). You need information on make and model numbers, together with installation guides. If you are missing anything visit the PC or MOBO manufacturers web site. Most have excellent online documentation.
Step 5: Do you have the correct RAM? Check the MOBO or computer
documentation for the type of memory module you should be using. Compare this with the memory module you have purchased. Look at the memory module; does the information on the module match with the sales invoice (have they sent you the correct product)? If you bought a name brand computer has the RAM purchased been tested on that particular computer? This can be an issue with Dell and other
computers. You can check compatibility issues online through useful tools on www.kingston.com, www.crucial.com or the MOBO manufacturers own web site.
NOTE: Before the computer case is opened make sure that power is
switched off and disconnected, press and hold the power button for 30 seconds to ensure residual power is lost and make sure that you are grounded to avoid damage due to static electricity. Use a grounding wrist strap or touch the metal case to discharge static electricity.
Now open the computer case to check the following.
Step 6: Is the RAM installed correctly? Some MOBOs must have their
slots filled in a special sequence. Sometimes DIMMs must be in a specific sequence.
Step 7: Remove the memory modules from their slots. Take the opportunity to clean the slots on the motherboards and the memory module connectors. Use compressed air to blow dust away and clean contacts with a soft cloth. Don't use a vacuum cleaner if it touches any component it may create a short and cause damage to the motherboard or other components. Don't use solvent that may attract dust and never poke things like cotton buds in to slots. Check the memory module and memory slot contacts. They are either tin or gold. The color will tell you which they are. Mixing tin and gold can result in corrosion that prevents proper contact. Look for any sign of physical damage to the memory module, memory slots or the motherboard. With the last two you are looking at replacing the motherboard.
Step 8: Reseat the memory modules. You should hear an audible click
when they are in place. Do not use too much force to reseat the memory module in to the slot this can cause damage to the module, slot or motherboard.
If you are still experiencing trouble try the following.
Step 9:Swap modules in to different slots. If you have more than
one memory module try different combinations or one at a time. This might identify a faulty component.
Step 10: If you have changed or upgraded the memory modules try taking your system back to its original configuration. Does it still work? If yes then suspect a fault or compatibility problem. If no!! Sorry but you may have damaged the motherboard.
Step 11: If your compute isn't recognizing all of your RAM it might
be a problem with the BIOS. Check with the motherboard or PC manufacturers web site for possible BIOS upgrades. Word of WARNING - BIOS upgrades can seriously damage your wealth. Make double sure that you have the correct BIOS update for your motherboard. Flash the wrong upgrade can result in needing a new motherboard.
Step 12:Check for viruses with an up to date virus checker. Some
viruses cause problems that look like memory errors.
Step 13:Try removing recently installed hardware or software.
Sometimes operating systems misinterpret problems as memory related.
Step 14:If you have tried everything a still suspect a faulty RAM
module there are several good programs that will test your computer. Typically you must create a boot disk to use when restarting your computer. This helps eliminate the possibility that it's operating system or other software problems.
Three options are -
*Gold memory
*Memtest86
*PCTechnician
If you have a Dell computer they have their own troubleshooting software that is worth using.
Step 15:If finally you need to use a computer technician or phone a technical support line make sure you have written down everything you did and the result. It can save you time and money.

Net Send Command

Microsoft Windows offers a simple method to send messages to other users or computers on the network - simple WinPopup Messages / Net Send Messages ( in Windows 95, Windows 98, Windows Me, Windows NT, Windows 2000, Windows XP and Windows 2003 )
Microsoft have not added program like the Winpopup into the Windows NT, Windows 2000,Windows XP and Windows 2003. However you can use Net send command to send network messages from the command line interface.

Incoming messages from other Windows systems are displayed in a simple Message box.
Note: There is no need to install anything and no need to start-up any special program, this message notification is always active. If you have not disabled the Messenger service.
To send WinPopup messages ( net send messages ), you need to open a Command Prompt Window ( DOS-box ), and use the NET SEND command. To get some more help on available options of the NET command , type : NET ? , for more info on a option, type: NET ? :

To send a message please type: net send recepient_name text_of_the_message

define the name of a user (which is logged on to the network) or a computer name ( as defined in the properties of the Network ), followed by the message text.
As with Winpopup, the system will only check, that the name is valid.
But if the receiving system is a Windows 95, Windows 98 or Windows Me system and WinPopup is NOT running, then this message will disappear into nowhere.
When sending a message to all systems of a Workgroup or Domain, it will also be displayed on the system which did send out the message :

As mentioned above: Windows NT, Windows 2000, Windows XP and Windows 2003 uses the same method (via the "NET SEND" - command ).
Note: the option "NET SEND" is NOT available in Windows 95, Windows 98 and Windows Me.

Structured Query Language(SQL) -an introduction


SQL often referred to as Structured Query Language is a database computer language designed for managing data in relational database management systems (RDBMS), and originally based upon relational algebra. Its scope includes data query and update, schema creation and modification, and data access control. SQL was one of the first languages for Edgar F. Codd's relational model in his influential 1970 paper, "A Relational Model of Data for Large Shared Data Banks" and became the most widely used language for relational databases.
History
SQL was developed at IBM by Donald D. Chamberlin and Raymond F. Boyce in the early 1970s. This version, initially called SEQUEL, was designed to manipulate and retrieve data stored in IBM's original relational database product, System R.During the 1970s, a group at IBM San Jose Research Laboratory developed the System R relational database management system. Donald D. Chamberlin and Raymond F. Boyce of IBM subsequently created the Structured English Query Language (SEQUEL or SEQL) to manage data stored in System R.The acronym SEQUEL was later changed to SQL because "SEQUEL" was a trademark of the UK-based Hawker Siddeley aircraft company.
The first Relational Database Management System (RDBMS) was RDMS, developed at MIT in the early 1970s, soon followed by Ingres, developed in 1974 at U.C. Berkeley. Ingres implemented a query language known as QUEL, which was later supplanted in the marketplace by SQL.In the late 1970s, Relational Software, Inc. (now Oracle Corporation) saw the potential of the concepts described by Codd, Chamberlin, and Boyce and developed their own SQL-based RDBMS with aspirations of selling it to the U.S. Navy, Central Intelligence Agency, and other U.S. government agencies. In the summer of 1979, Relational Software, Inc. introduced the first commercially available implementation of SQL, Oracle V2 (Version2) for VAX computers. Oracle V2 beat IBM's release of the System/38 RDBMS to market by a few weeks.After testing SQL at customer test sites to determine the usefulness and practicality of the system, IBM began developing commercial products based on their System R prototype including System/38, SQL/DS, and DB2, which were commercially available in 1979, 1981, and 1983, respectively.Common criticisms of SQL include a perceived[weasel words] lack of cross-platform portability between vendors, inappropriate handling of missing data (see Null (SQL)), and unnecessarily complex and occasionally ambiguous language grammar and semantics[citation needed]. It also lacks the rigour of more formal languages such as Relational Algebra[citation needed].
Queries
The most common operation in SQL is the query, which is performed with the declarative SELECT statement. SELECT retrieves data from one or more tables, or expressions. Standard SELECT statements have no persistent effects on the database. Some non-standard implementations of SELECT can have persistent effects, such as the SELECT INTO syntax that exists in some databases.Queries allow the user to describe desired data, leaving the database management system (DBMS) responsible for planning, optimizing, and performing the physical operations necessary to produce that result as it chooses.A query includes a list of columns to be included in the final result immediately following the SELECT keyword. An asterisk ("*") can also be used to specify that the query should return all columns of the queried tables. SELECT is the most complex statement in SQL, with optional keywords and clauses that include:
The FROM clause which indicates the table(s) from which data is to be retrieved. The FROM clause can include optional JOIN subclauses to specify the rules for joining tables.
The WHERE clause includes a comparison predicate, which restricts the rows returned by the query. The WHERE clause eliminates all rows from the result set for which the comparison predicate does not evaluate to True.
The GROUP BY clause is used to project rows having common values into a smaller set of rows. GROUP BY is often used in conjunction with SQL aggregation functions or to eliminate duplicate rows from a result set. The WHERE clause is applied before the GROUP BY clause.
The HAVING clause includes a predicate used to filter rows resulting from the GROUP BY clause. Because it acts on the results of the GROUP BY clause, aggregation functions can be used in the HAVING clause predicate.
The ORDER BY clause identifies which columns are used to sort the resulting data, and in which direction they should be sorted (options are ascending or descending). Without an ORDER BY clause, the order of rows returned by an SQL query is undefined.
Click here to download free tutorial on SQL Queries

How to Recover or Repair Scratched CD/DVD


There are many softwares available on the net, which enable the recovery of the CD data.BadCopy Pro is one such software, which can be used to recover destroyed data and files from a range of media.Just a few clicks is all it requires to recover the disc from almost all kind of damage situation; be it corrupted, lost data, unreadable or defective.DiskDoctors is another popular company, which offers both software and solutions to recover data from a scratched CDs and DVDs.
Click here to download Badcopypro

Nokia Mobile Shortcut Codes


These Nokia codes will work on most Nokia Mobile Phones
(1) *3370# Activate Enhanced Full Rate Codec (EFR) - Your phone uses the best sound quality but talktime is reduced my approx. 5%
(2)#3370# Deactivate Enhanced Full Rate Codec (EFR) OR *3370# ( Favourite )
(3)*#4720# Activate Half Rate Codec - Your phone uses a lower quality sound but you should gain approx 30% more Talk Time.
(4)*#4720# Deactivate Half Rate Codec.
(5)*#0000# Displays your phones software version, 1st Line : Software Version, 2nd Line : Software Release Date, 3rd Line : Compression Type. ( Favourite )
(6)*#9999# Phones software version if *#0000# does not work.
(7)*#06# For checking the International Mobile Equipment Identity (IMEI Number). ( Favourite )
(8)#pw+1234567890+1# Provider Lock Status. (use the "*" button to obtain the "p,w"
and "+" symbols).
(9)#pw+1234567890+2# Network Lock Status. (use the "*" button to obtain the "p,w"
and "+" symbols).
(10)#pw+1234567890+3# Country Lock Status. (use the "*" button to obtain the "p,w"
and "+" symbols).
(11)#pw+1234567890+4# SIM Card Lock Status. (use the "*" button to obtain the "p,w"
and "+" symbols).
(12)*#147# (vodafone) this lets you know who called you last.
(13)*#1471# Last call (Only vodofone).
(14)*#21# Allows you to check the number that "All Calls" are diverted to
(15)*#2640# Displays security code in use.
(16)*#30# Lets you see the private number.
(17)*#43# Allows you to check the "Call Waiting" status of your phone.
(18)*#61# Allows you to check the number that "On No Reply" calls are diverted to.
(19)*#62# Allows you to check the number that "Divert If Unreachable (no service)" calls
are diverted to.
(20)*#67# Allows you to check the number that "On Busy Calls" are diverted to.
(21)*#67705646# Removes operator logo on 3310 & 3330.
(22)*#73# Reset phone timers and game scores.
(23)*#746025625# Displays the SIM Clock status, if your phone supports this power saving feature "SIM Clock Stop Allowed", it means you will get the best standby time possible.
(24) *#7760# Manufactures code.
(25)*#7780# Restore factory settings.
(26)*#8110# Software version for the nokia 8110.
(27)*#92702689# Displays - 1.Serial Number, 2.Date Made, 3.Purchase Date, 4.Date of last repair (0000 for no repairs), 5.Transfer User Data. To exit this mode you need to switch your phone off then on again. ( Favourite )
(28)*#94870345123456789# Deactivate the PWM-Mem.
(29)**21*number# Turn on "All Calls" diverting to the phone number entered.
(30)**61*number# Turn on "No Reply" diverting to the phone number entered.
(31)**67*number# Turn on "On Busy" diverting to the phone number entered.
(32)12345 This is the default security code.