Saturday, May 29, 2010

Let us Know some thing about MS Office


Microsoft Office is an office suite of interrelated desktop applications, servers and services for the Microsoft Windows and Mac OS X operating systems. Microsoft Office was introduced by Microsoft in 1989 for Macintosh, with a version for Windows in 1990. Initially a marketing term for a bundled set of applications, the first version of Office contained Microsoft Word, Microsoft Excel, and Microsoft PowerPoint. Additionally, a "Pro" (Professional) version of Office included Microsoft Access and Schedule Plus. Over the years, Office applications have grown substantially closer with shared features such as a common spell checker, OLE data integration and Microsoft Visual Basic for Applications scripting language. Microsoft also positions Office as a development platform for line-of-business software under the Office Business Applications (OBA) brand.
The current versions are Office 2007 for Windows which was released on January 30, 2007,[4], and Office 2008 for Mac OS X, released January 15, 2008. Office 2007/Office 2008 introduced a new user interface and new Office Open XML document formats (docx, xlsx, pptx). Consequently, Microsoft has made available, free of charge, an add-on known as the Microsoft Office Compatibility Pack to allow Office 2000-2003 for Windows and Office 2004 for Mac editions to open, edit, and save documents created under the new formats for Office 2007.
According to Forrester Research, as of June 2009, some version of Microsoft Office is used in 80% of enterprises, and 64% of enterprises have the latest Office version used.
Click here to download MS Word Tutorial
Click here to download MS Excel Tutorial
Click here to download MS PowerPoint Tutorial
Click here to download MS Access Tutorial
Click here to download MS office Shortcuts

Sunday, May 16, 2010

Internet Explorer Tips


In order to use the Internet Explorer (IE) effectively, we have some basic tips for you to try…
1. To extend the window area of the IE, you can make it easy by pressing the F11 key. Then you press it again in order to return the IE to the normal window.
2. Sometimes you want to search a keyword in a long web page that you are surfing. How do you do ?? Just press Ctrl+F and place the keyword you want.
3. Using Backspace key in your keyboard instead of clicking Back in the IE window.
4. You can close your IE window that you are surfing by Ctrl+W.
5. To see the surfing websites history, Press F4 key to see the URL which you have typed.
6. Press Ctrl+D in order to save the url which you are surfing. And the url will be in the Favorites.
7. To send a web page to your friend. Do you know we can send it by email from the IE's tools ? Let you try it, go to File > Send > Page by E-mail...
8. To slide the web page by using the keyboard, try it with the arrow keys. To slide it to the bottom and the top of the web page, try the End and Home key.
9. If you find a picture that you prefer it to be the desktop wallpaper, you can immediately set it, right click on the picture area and select the Set as wallpaper.
10. To slide the web page gradually, you may use the Page up, Page down and Spacebar keys. Try it!

Hiren's BootCD


Hiren's BootCD is a set of applications that provides advanced tools for analyzing, recovering and fixing your computer. Available as a free download and only 186MB in size, Hiren's BootCD is a great resource for anyone with computer problems who is having trouble accessing the Internet to download programs in an attempt to fix it. With some simple knowledge about what is contained on the CD, you can use it to repair many problems computer.
1.Partition Tools
If you need to make changes to the partitions on your computer, there are several applications that provides various levels of functionality for accomplishing this goal. You can both create and delete partitions from your computer, even while there are other partitions on the hard drive you are modifying. You can also resize partitions if needed, to change how much space is allocated to them.
2.Backup and Recovery
There are several backup and recovery tools on Hiren's BootCD. Backup tools let you copy data off of your hard drive and schedule automatic backups to ensure your data is saved to another location. You can also recover deleted data, whether that data was deleted intentionally or accidentally. There are also a few tools that will help you recover data from damaged or corrupted portions of your hard drive if you are unable to recover them through other methods.
3.Testing Tools
Hiren's BootCD provides a variety of tools for testing different aspects of your computer. If you suspect that your RAM is corrupted or that a piece of hardware on your machine is not functioning properly, there are several applications you can run to determine the problems. You can also perform hard drive tests to see whether your hard drive is physically damaged, and get a report on how much longer your hard drive is expected to work.
4.Password Tools
Password recovery and modification tools are also provided on Hiren's BootCD. You can change the administrator password on Windows machines, and there are utilities for saving passwords for your online accounts in an encrypted format. You can also encrypt your entire hard drive with Hiren's BootCD so that a password is required to read or write any data from or to your hard drive.
5.Mini Windows XP
To clear a virus and use a large collection of Hiren's Boot tools, choose the Mini Windows XP option. A simple version of Windows XP will load on the computer. It might take a few minutes to load everything because it processes files directly from the CD. Once it has loaded, wait for the Hiren's Boot disk menu to pop up. Select the "Menu" option and scroll through the programs. The disk features Windows password hackers, registry cleaners and a large collection of antivirus software.
You can download iso image of Hiren's BootCD from any one of following link.And then burn iso image to CD using ISO Burning Tool
RapidShare Link
NetLoad Link
Click here to download ISO Burning Tool

Advanced System Care free edition


Advanced SystemCare PRO is combination of great set of PC system utilities that does exactly what it set out to do. Advanced SysteCare PRO has all the essential tools to help clean and repair your registry, helping you keep your PC running at peak performance.Also Advanced SystemCare Pro provides an always-on, automated, all-in-one PC Healthcare Service with anti-spyware, privacy protection, performance tune-ups, and system cleaning capabilities. This powerful tool fixes stubborn errors, cleans out clutter, optimizes Internet and download speeds, ensures personal security, and maintains maximum computer performance automatically.
Key Benefits:
Ultimate Speeding Up with Turbo Boost
Powerful Hard Drive Defragmentation
Fixes the registry errors that other utilities miss with “Deep Scan” technology
Automated Working in the Background
Defends PC Security with Extra Protection
Keeps Your PC Running at Peak Performance
Fixes Multiple System Errors
Utility to take backup of all installed drivers before system format.
Click on the below link to download advance system care

Rajesh H,Puttur HPO

SQL 2000 Tutorial


Microsoft SQL Server 2000 is a full-featured relational database management system (RDBMS) that offers a variety of administrative tools to ease the burdens of database development, maintenance and administration. In this article, we'll cover six of the more frequently used tools: Enterprise Manager, Query Analyzer, SQL Profiler, Service Manager, Data Transformation Services and Books Online.
Click here to download Simple SQL Tutorial in PDF Format

Wednesday, April 28, 2010

Restart a PC via Remote desktop


How to restart your computer via remote desktop? There are couple of ways you can do this
1. Alt+F4 is one of the easiest ways you can do it. Then select the Restart.
2. Ctr+Alt+End and the select the Restart
3. Start > Run > then type shutdown.exe

Sunday, April 25, 2010

Team Viewer


TeamViewer connects to any PC or server around the world within a few seconds. You can remote control your partner's PC as if you were sitting right in front of it.
Click here to download Team Viewer4.0

Saturday, April 24, 2010

Using AnalogX Proxy to share an Internet Connection in a network


Are you're using Internet Connection Sharing, but not satisfied with the results? You may try AnalogX Proxy server. It is very compact and easy to use. AnalogX Proxy is a small and simple server that allows any other machine on your local network to route it's requests through a central machine. Run Proxy on the machine with the internet connection and configure the other machines to use the Proxy Server. Supports all Windows Operating Systems.
In System having direct internet connection (USB connection)
Download AnalogX Proxy and install it.
Open Network Connections folder
Right-click the LAN connection, choose Properties
Select Internet Protocol (TCP/IP) from the list
Choose Properties.
Notedown the IP address
Click OK, then Close.
In the Client computers
Click Start, Run and type CONTROL INETCPL.CPL
Choose Connections tab and click LAN Settings
In the Proxy Server section, type in IP address of the host computer(i.e You have note downed).
Mention 6588 as the Port Number (for http)
Click OK, OK and close the dialogs.
AnalogX notifies you that the Proxy is in open mode, the first time when you use it. You need to change it to closed mode so that only your local network accesses this Proxy server.
Click here to download Analogx proxyi

ADSL 2+ MODEM DRIVERS


The usb modem drivers for the adsl 2+ modems is available in the following link.
Click here to download USB Modem Drivers

Sunday, April 18, 2010

Set a program to run automatically (autorun)


Using autorun, you can set a program to start up automatically when you connect the pen drive to a computer. You can also use the same script for a data CD-ROM. Note that some computers have autorun disabled for security purposes.
Open up notepad and paste the following script:
[autorun]
ShellExecute=filename
Label=description
UseAutoPlay=1

Make sure you replace filename with the full path to the file. For example, a file called program.exe in a folder called “programs” on the thumb drive would be /programs/program.exe
Replace description with a short description of the program, for example, My Jukebox or Mozilla Firefox.
Save the file as autorun.inf, making sure you select “All Programs” from the save menu, not “Text document”!

Saturday, April 17, 2010

Windows XP Universal Ethernet Drivers


You can download here Universal LAN drivers which are compactable to most of network cards.
Click here to download Universal XP Lan Drivers

Zback 2.00.0


Zback is a backup and synchronize tool with a small footprint. Copy modes include update files, refresh existing files, or mirror source to target and can be run manually, from batch/script, or from the command line. Users can filter files based on extension, size, date, subdirectories and preview their backup/sync before running.
Click here to download Zback

Thursday, April 15, 2010

How to disable Open File Security Warning when running applications?


Run gpedit.msc, and go to Local Computer Policy->User
Configuration->Administrative Templates->Windows
Components->Attachment Manager and enable "Default risk level for file attachments", and then enable "Inclusion list for low risk file types" and add to this list the file extensions that you want to open without triggering this crap.

Wednesday, April 14, 2010

DataRecovery


DataRecovery is freeware and written by TOKIWA to undelete accidentally deleted files even from recycle bin. But DataRecovery doesn't assure that all files deleted can be recovered successfully.
Click here to download DataRecovery

HP USB Disk Storage Format Tool


This utility will format any USB flash drive, with your choice of FAT, FAT32, or NTFS partition types.
Click here to download USB Formatter

DBF Viewer Plus


DBF Viewer Plus is a portable DBF table viewer plus some additional features for editing and searching.
Click here to download DBF Viewer

Sunday, April 11, 2010

USB Disk Security


USB Disk Security provides protection against any threats via USB drive. USB Disk Security is the best antivirus software to permanently protect offline computer without the need for signature updates, but other antivirus software should update signature database regularly, and they cannot effectively protect offline computer. This light and easy to use solution is 100% compatible with all software and doesn't slow down your computer at all. You pay USB Disk Security once and get it all, however, other antivirus products should be paid for updates every year.
Click here to download USB Disk Security

Aespe Table Browser for MS SQL Server


Aespe Table Browser for MS SQL Server provides a simplified way to browse MS SQL database tables without having to use any SQL syntax to sort the columns or to perform basic filtering. The program lists the tables in a Windows Explorer style tree view to the left and selecting one will open the first 100 rows (can be changed). The right click column for each row offers additional copy options that lets you copy the row content in different formats. Additional features include several query helpers to filter the output and search for specific row content as well as an option to run SQL queries.
Click here to download Aespe Table Browser

PDF to Word Converter


Free PDF to Word is a portable tool that can be used to convert PDF files to DOC (Microsoft Word Document) or RTF (Rich Text Format). Free PDF to Word also preserves the format when performing the DOC or RTF conversion and can convert encrypted PDF files as well. The application is stand alone and does not require adobe software be installed to run.
How to make Free PDF to Word:
Download the Portable PDF Converter HERE
Install the software to your PC as usual
Copy the C:\Program Files\Free PDF to Word Converter folder to your USB device
Click PDF2Word.exe to launch the program
Click here to download PDF to Word Converter

DriverBackup


DriverBackup is a nice driver backup tool that allows a user to create a backup of his or her hardware driver files. DriverBackup preserves drivers of your hardware peripherals by saving them into a user specified location. You can then quickly reinstall your system hardware drivers if need be from the saved location. This tool uses 212KB of disk space once extracted making it ideal for portable usage.
Click here to download driver backup

Disk Wipe


Disk Wipe is a Portable Disk Wiper that can be used to permanently remove data from hard drives, flash cards, USB drives, mp3 players, cameras and other storage devices. The tool provides secure permanent data destruction by deleting all information from the storage device, making it virtually impossible to perform data retrieval. Disk Wipe supports devices the utilize a NTFS, Fat, or Fat32 file format.
Click here to download DiskWipe

Portable CD/DVD burning tool


CDBurnerXP is a CD DVD Blu-Ray Burning Software. It can be used to burn CDs and DVDs, including Blu-Ray and HD-DVDs. The CD DVD Burning Tool offers features commonly found in purchased CD/DVD/Blu-Ray Recording Software. Examples include: Ability to burn and create ISOs, compile your own audio disks or data disks, Bin – Nrg to ISO converter, Create bootable CD's and much more. CDBurner Portable is available in a stand alone version, enabling you to store and run the tool from a USB device.
Click here to download CDBurnerXP

Partition Manager


EASEUS Partition Manager Home Edition is a free comprehensive hard disk partition management software to allows users to perform all the powerful functions relation to volume partitioning such as resize and move partitions, copy partition, copy disk, create, delete and format partitions, hide and unhide partitions and much more.
Main features of EASEUS Partition Manager Home Edition include:
Resize/Move partitions without losing data.
Disk Copy, Partition Copy to protect data.
Create and delete partitions with simple step.
Hide and Unhide partitions.
Format partitions.
Click here to download Partition Manager

Record your computer screen


Camstudio is a software which is useful to record computers screen when you are working.
Click here to download Camstudio

Working with PLI WAN Website in windows Vista and Internet Explorer 8


Now PLI website working in Windows Vista and Internet Explorer 8.Please download dll file from the following link and go through readme file.
Click here to install java oracle initiator
Click here to download Patch for Vista

Windows Service Packs


Service packs are the means by which product updates are distributed. Service packs may contain updates for system reliability, program compatibility, security, and more.
Click here to download Hotfix for Windows server 2003
Click here to download Vista ServicePack2
Click here to download XP ServicePack3
Click here to download Windows Server 2003 ServicePack2

Saturday, April 10, 2010

DB Tools


DB Tools is a small software which can help you to take backup,shrink,log clearing of SQL databases.Please download DB Tools from the following link and unzip ocx files. Paste all ocx files to C:\Windows\System32 and register all ocx files using RegisterOCX.bat.Then double click on DB Tolls.exe and save SQL Server and sa passward information.Then start to use DB Tools.
Click here to download DB Tools

Easy process for booking hardware compalint to HP


01. Open website www.itrc.hp.com
02. For first time u have create one user name and password by clicking register button on left side.
03. Login with ur user name and password
04. In the options select support case manager.
05. Enter Product no (ex: NA*****) and sl no of CPU (EX: INA*******)
06. Click on next
07. If ur cpu exist in warranty it wil ask ur contact address and problem description.
08. Enter the details of the hard ware which have problem ( for example if keyboard not working enter the model of the keyboard i.e ps/2 or usb)
09. After completion click on submit to generate the case id.
with the above case id u can know the status of ur complaint.

Speeding Up : WinXP’s Shutdown


It’s not only start-up that you’d like to speed up; you can also make sure that your system shuts down faster. If shutting down XP takes what seems to be an inordinate amount of time, here are a couple of steps you can take to speed up the shutdown process:
Don’t have XP clear your paging file at shutdown. For security reasons, you can have XP clear your paging file (pagefile.sys) of its contents whenever you shut down. Your paging file is used to store temporary files and data, but when your system shuts down, information stays in the file. Some people prefer to have the paging file cleared at shutdown because sensitive information such as unencrypted passwords sometimes ends up in the file. However, clearing the paging file can slow shutdown times significantly, so if extreme security isn’t a high priority, you might not want to clear it. To shut down XP without clearing your paging file, run the Registry Editor (click Start > Run, then type regedit in the Run box) and go to:
HKEY_LOCAL_MACHINE\SYSTEM\CurrentControlSet\Control\Session Manager\Memory Management
Change the value of ClearPageFileAtShutdown to 0. Close the Registry, and restart your computer. Whenever you turn off XP from now on, the paging file won’t be cleared, and you should be able to shut down more quickly.
Note: Please be careful when editing the Registry; you can do a lot of damage here. Don’t change or delete anything unless you know exactly what it is.

Tuesday, April 6, 2010

What is new in Windows XP SP3


Click here to download SP3 of Windows XP
Some of the new features found in Windows XP SP3 are:
Network Access Protection compatibility (NAP). Announced a while back, this feature enables Windows XP computers to leverage the NAP feature in Windows Server 2008. This is also found in Windows Vista. From a compliance perspective this is a big win, as this element enables users to better protect their network by evaluating the connected system’s heath status, for example, the antivirus pattern level and the patch level of the respective machine. If the computer at time of connection complies with the prerequisite policy element then the machine is allowed network access, if the policy is not met then the machine is quarantined to a network segment, which has limited access to resources. This limited access allows for the machine to be updated to an acceptable level before being scanned again and approved to be used on the production network.From a remote access perspective this feature is useful as travelling users are known to be in “promiscuous mode”, meaning they will connect to any network or computer that they may come across during their time away from the office. This in turn may leave the computer exposed and the vulnerability could be exploited or malware could slip past the antivirus defences. This would potentially lead to a compromise and result in unauthorised access or the malicious software could propagate once the remote user connects. The quarantine option scans and verifies that the computer is protected and set to an acceptable level before being allowed access through to the remote environment. This is a long awaited feature and is welcome in many circles.
Product Key-less install option. As with Windows Vista, XP SP3 installs can proceed without entering a product key during setup. But keep your product key handy as thirty days later you will have to enter the key in or your operating system will be reduced to a limited mode version.
Kernel Mode Cryptographic Module. This feature is a kernel module that "encapsulates several different cryptographic algorithms," not quite sure what that entails but I am sure this feature is going to be used to better enhance how XP handles crypto requests at the application layer. More encryption, more protection, as long as the keys are secure. I look forward to this feature and am interested in how vendors will leverage this.
"Black hole" router detection algorithm. This feature enables the XP client to identify routers that drop packets. This is a backported feature found in Windows Vista.
Simple Policy Update for Windows XP: A welcome feature that helps make things easier when it comes to the mysterious topic of XP IPSec; the creation and maintenance of IPSec filters. The simplification of this feature makes it a lot easier to rollout IPSec for domain and network communication.
Digital Identity Management Service (DIMS): This feature enables the users logged into any domain based computer to seamlessly access their certificates and private keys for applications and services.
Wi-Fi Protected Access 2 (WPA2): This feature adds support for WPA2, or IEEE 802.11i standard. More security for wireless communication is a true relief as natively XP lacked the ability to do this without a third party component. From a security perspective this is a welcome change. I am not sure how many organizations will implement this technology just yet as previously it has suffered from complex design.
1,073 fixes are part of this update. These updates upgrade Windows XP to the very latest version including all the hardware support and software upgrades that are not included in Windows update. A common question is: do I need to install service pack 1 and 2 before installing service pack 3; the simple answer is no, service pack 3 already contains the updates and features of service pack 1 and 2.
Performance After installing it was found that the performances on the laptop improved by 16%. Figures have been reported in the industry of up-to 25% but this still needs to be clarified. The official figures are closer to 10%.

Sunday, April 4, 2010

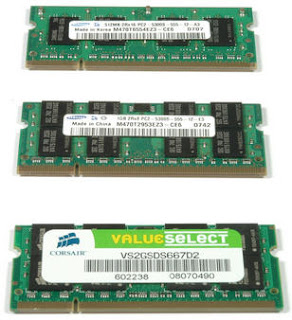
Trouble Shooting on RAM -Some Tips


It's rare but RAM modules can cause problems. Unfortunately, it's not always certain that the memory errors being reported by your system is actually due to problems with the RAM modules. Even worse is that an unstable system can be due to many problems including RAM failure.
Step 1: Back up all important files and data. You should be doing this on a regular basis anyway but if your computer is showing signs of failure don't wait any longer to perform this job.
Step 2: Start simple and analyze the problem.
* Have you added or replaced RAM? Is it installed properly?
* Have you moved the computer? RAM modules can come loose.
* Is it a new computer? RAM modules might not have been inserted properly.
* Have you installed any new hardware upgrades?
* Have you installed new software or might there be a virus problem?
* Have you changed or installed patches for your operating system?
* Do you have the correct RAM type?
* Is the RAM module connectors tin or gold?
* When your computer starts (boots) does it report the correct amount of RAM?
* Does your system properties report the correct amount of RAM?
* Are there any POST messages that indicate RAM problems?
* Does the system report Parity errors or address failures whilst the system is
running?
* Do you get a Windows error message "exception error OE at>>0137:BFF9z5d0" or something similar?
* You've tried everything else!!!
Any one of these can indicate a problem with the RAM module or something connected with it.
WARNING:Before you start troubleshooting remember that you are
dealing with electricity that can KILL. Only work inside the computer case when the power has been switched off and disconnected. Never open the power source.
Step 3: Start by reading through this article to establish some
ideas about what the problem might be and how to resolve it. There is no absolute order for diagnosing problems it's equal parts science and magic. If it's hardware then you are probably going to have to open the computer case (steps 5 - 10 & 13). You may prefer to eliminate other problems first (steps 11-12). Or even run
diagnostic software (step 14)
Step 4: Gather all the documentation that came with your computer, memory modules or MOBO (motherboard). You need information on make and model numbers, together with installation guides. If you are missing anything visit the PC or MOBO manufacturers web site. Most have excellent online documentation.
Step 5: Do you have the correct RAM? Check the MOBO or computer
documentation for the type of memory module you should be using. Compare this with the memory module you have purchased. Look at the memory module; does the information on the module match with the sales invoice (have they sent you the correct product)? If you bought a name brand computer has the RAM purchased been tested on that particular computer? This can be an issue with Dell and other
computers. You can check compatibility issues online through useful tools on www.kingston.com, www.crucial.com or the MOBO manufacturers own web site.
NOTE: Before the computer case is opened make sure that power is
switched off and disconnected, press and hold the power button for 30 seconds to ensure residual power is lost and make sure that you are grounded to avoid damage due to static electricity. Use a grounding wrist strap or touch the metal case to discharge static electricity.
Now open the computer case to check the following.
Step 6: Is the RAM installed correctly? Some MOBOs must have their
slots filled in a special sequence. Sometimes DIMMs must be in a specific sequence.
Step 7: Remove the memory modules from their slots. Take the opportunity to clean the slots on the motherboards and the memory module connectors. Use compressed air to blow dust away and clean contacts with a soft cloth. Don't use a vacuum cleaner if it touches any component it may create a short and cause damage to the motherboard or other components. Don't use solvent that may attract dust and never poke things like cotton buds in to slots. Check the memory module and memory slot contacts. They are either tin or gold. The color will tell you which they are. Mixing tin and gold can result in corrosion that prevents proper contact. Look for any sign of physical damage to the memory module, memory slots or the motherboard. With the last two you are looking at replacing the motherboard.
Step 8: Reseat the memory modules. You should hear an audible click
when they are in place. Do not use too much force to reseat the memory module in to the slot this can cause damage to the module, slot or motherboard.
If you are still experiencing trouble try the following.
Step 9:Swap modules in to different slots. If you have more than
one memory module try different combinations or one at a time. This might identify a faulty component.
Step 10: If you have changed or upgraded the memory modules try taking your system back to its original configuration. Does it still work? If yes then suspect a fault or compatibility problem. If no!! Sorry but you may have damaged the motherboard.
Step 11: If your compute isn't recognizing all of your RAM it might
be a problem with the BIOS. Check with the motherboard or PC manufacturers web site for possible BIOS upgrades. Word of WARNING - BIOS upgrades can seriously damage your wealth. Make double sure that you have the correct BIOS update for your motherboard. Flash the wrong upgrade can result in needing a new motherboard.
Step 12:Check for viruses with an up to date virus checker. Some
viruses cause problems that look like memory errors.
Step 13:Try removing recently installed hardware or software.
Sometimes operating systems misinterpret problems as memory related.
Step 14:If you have tried everything a still suspect a faulty RAM
module there are several good programs that will test your computer. Typically you must create a boot disk to use when restarting your computer. This helps eliminate the possibility that it's operating system or other software problems.
Three options are -
*Gold memory
*Memtest86
*PCTechnician
If you have a Dell computer they have their own troubleshooting software that is worth using.
Step 15:If finally you need to use a computer technician or phone a technical support line make sure you have written down everything you did and the result. It can save you time and money.

Net Send Command

Microsoft Windows offers a simple method to send messages to other users or computers on the network - simple WinPopup Messages / Net Send Messages ( in Windows 95, Windows 98, Windows Me, Windows NT, Windows 2000, Windows XP and Windows 2003 )
Microsoft have not added program like the Winpopup into the Windows NT, Windows 2000,Windows XP and Windows 2003. However you can use Net send command to send network messages from the command line interface.

Incoming messages from other Windows systems are displayed in a simple Message box.
Note: There is no need to install anything and no need to start-up any special program, this message notification is always active. If you have not disabled the Messenger service.
To send WinPopup messages ( net send messages ), you need to open a Command Prompt Window ( DOS-box ), and use the NET SEND command. To get some more help on available options of the NET command , type : NET ? , for more info on a option, type: NET ? :

To send a message please type: net send recepient_name text_of_the_message

define the name of a user (which is logged on to the network) or a computer name ( as defined in the properties of the Network ), followed by the message text.
As with Winpopup, the system will only check, that the name is valid.
But if the receiving system is a Windows 95, Windows 98 or Windows Me system and WinPopup is NOT running, then this message will disappear into nowhere.
When sending a message to all systems of a Workgroup or Domain, it will also be displayed on the system which did send out the message :

As mentioned above: Windows NT, Windows 2000, Windows XP and Windows 2003 uses the same method (via the "NET SEND" - command ).
Note: the option "NET SEND" is NOT available in Windows 95, Windows 98 and Windows Me.

Structured Query Language(SQL) -an introduction


SQL often referred to as Structured Query Language is a database computer language designed for managing data in relational database management systems (RDBMS), and originally based upon relational algebra. Its scope includes data query and update, schema creation and modification, and data access control. SQL was one of the first languages for Edgar F. Codd's relational model in his influential 1970 paper, "A Relational Model of Data for Large Shared Data Banks" and became the most widely used language for relational databases.
History
SQL was developed at IBM by Donald D. Chamberlin and Raymond F. Boyce in the early 1970s. This version, initially called SEQUEL, was designed to manipulate and retrieve data stored in IBM's original relational database product, System R.During the 1970s, a group at IBM San Jose Research Laboratory developed the System R relational database management system. Donald D. Chamberlin and Raymond F. Boyce of IBM subsequently created the Structured English Query Language (SEQUEL or SEQL) to manage data stored in System R.The acronym SEQUEL was later changed to SQL because "SEQUEL" was a trademark of the UK-based Hawker Siddeley aircraft company.
The first Relational Database Management System (RDBMS) was RDMS, developed at MIT in the early 1970s, soon followed by Ingres, developed in 1974 at U.C. Berkeley. Ingres implemented a query language known as QUEL, which was later supplanted in the marketplace by SQL.In the late 1970s, Relational Software, Inc. (now Oracle Corporation) saw the potential of the concepts described by Codd, Chamberlin, and Boyce and developed their own SQL-based RDBMS with aspirations of selling it to the U.S. Navy, Central Intelligence Agency, and other U.S. government agencies. In the summer of 1979, Relational Software, Inc. introduced the first commercially available implementation of SQL, Oracle V2 (Version2) for VAX computers. Oracle V2 beat IBM's release of the System/38 RDBMS to market by a few weeks.After testing SQL at customer test sites to determine the usefulness and practicality of the system, IBM began developing commercial products based on their System R prototype including System/38, SQL/DS, and DB2, which were commercially available in 1979, 1981, and 1983, respectively.Common criticisms of SQL include a perceived[weasel words] lack of cross-platform portability between vendors, inappropriate handling of missing data (see Null (SQL)), and unnecessarily complex and occasionally ambiguous language grammar and semantics[citation needed]. It also lacks the rigour of more formal languages such as Relational Algebra[citation needed].
Queries
The most common operation in SQL is the query, which is performed with the declarative SELECT statement. SELECT retrieves data from one or more tables, or expressions. Standard SELECT statements have no persistent effects on the database. Some non-standard implementations of SELECT can have persistent effects, such as the SELECT INTO syntax that exists in some databases.Queries allow the user to describe desired data, leaving the database management system (DBMS) responsible for planning, optimizing, and performing the physical operations necessary to produce that result as it chooses.A query includes a list of columns to be included in the final result immediately following the SELECT keyword. An asterisk ("*") can also be used to specify that the query should return all columns of the queried tables. SELECT is the most complex statement in SQL, with optional keywords and clauses that include:
The FROM clause which indicates the table(s) from which data is to be retrieved. The FROM clause can include optional JOIN subclauses to specify the rules for joining tables.
The WHERE clause includes a comparison predicate, which restricts the rows returned by the query. The WHERE clause eliminates all rows from the result set for which the comparison predicate does not evaluate to True.
The GROUP BY clause is used to project rows having common values into a smaller set of rows. GROUP BY is often used in conjunction with SQL aggregation functions or to eliminate duplicate rows from a result set. The WHERE clause is applied before the GROUP BY clause.
The HAVING clause includes a predicate used to filter rows resulting from the GROUP BY clause. Because it acts on the results of the GROUP BY clause, aggregation functions can be used in the HAVING clause predicate.
The ORDER BY clause identifies which columns are used to sort the resulting data, and in which direction they should be sorted (options are ascending or descending). Without an ORDER BY clause, the order of rows returned by an SQL query is undefined.
Click here to download free tutorial on SQL Queries

How to Recover or Repair Scratched CD/DVD


There are many softwares available on the net, which enable the recovery of the CD data.BadCopy Pro is one such software, which can be used to recover destroyed data and files from a range of media.Just a few clicks is all it requires to recover the disc from almost all kind of damage situation; be it corrupted, lost data, unreadable or defective.DiskDoctors is another popular company, which offers both software and solutions to recover data from a scratched CDs and DVDs.
Click here to download Badcopypro

Nokia Mobile Shortcut Codes


These Nokia codes will work on most Nokia Mobile Phones
(1) *3370# Activate Enhanced Full Rate Codec (EFR) - Your phone uses the best sound quality but talktime is reduced my approx. 5%
(2)#3370# Deactivate Enhanced Full Rate Codec (EFR) OR *3370# ( Favourite )
(3)*#4720# Activate Half Rate Codec - Your phone uses a lower quality sound but you should gain approx 30% more Talk Time.
(4)*#4720# Deactivate Half Rate Codec.
(5)*#0000# Displays your phones software version, 1st Line : Software Version, 2nd Line : Software Release Date, 3rd Line : Compression Type. ( Favourite )
(6)*#9999# Phones software version if *#0000# does not work.
(7)*#06# For checking the International Mobile Equipment Identity (IMEI Number). ( Favourite )
(8)#pw+1234567890+1# Provider Lock Status. (use the "*" button to obtain the "p,w"
and "+" symbols).
(9)#pw+1234567890+2# Network Lock Status. (use the "*" button to obtain the "p,w"
and "+" symbols).
(10)#pw+1234567890+3# Country Lock Status. (use the "*" button to obtain the "p,w"
and "+" symbols).
(11)#pw+1234567890+4# SIM Card Lock Status. (use the "*" button to obtain the "p,w"
and "+" symbols).
(12)*#147# (vodafone) this lets you know who called you last.
(13)*#1471# Last call (Only vodofone).
(14)*#21# Allows you to check the number that "All Calls" are diverted to
(15)*#2640# Displays security code in use.
(16)*#30# Lets you see the private number.
(17)*#43# Allows you to check the "Call Waiting" status of your phone.
(18)*#61# Allows you to check the number that "On No Reply" calls are diverted to.
(19)*#62# Allows you to check the number that "Divert If Unreachable (no service)" calls
are diverted to.
(20)*#67# Allows you to check the number that "On Busy Calls" are diverted to.
(21)*#67705646# Removes operator logo on 3310 & 3330.
(22)*#73# Reset phone timers and game scores.
(23)*#746025625# Displays the SIM Clock status, if your phone supports this power saving feature "SIM Clock Stop Allowed", it means you will get the best standby time possible.
(24) *#7760# Manufactures code.
(25)*#7780# Restore factory settings.
(26)*#8110# Software version for the nokia 8110.
(27)*#92702689# Displays - 1.Serial Number, 2.Date Made, 3.Purchase Date, 4.Date of last repair (0000 for no repairs), 5.Transfer User Data. To exit this mode you need to switch your phone off then on again. ( Favourite )
(28)*#94870345123456789# Deactivate the PWM-Mem.
(29)**21*number# Turn on "All Calls" diverting to the phone number entered.
(30)**61*number# Turn on "No Reply" diverting to the phone number entered.
(31)**67*number# Turn on "On Busy" diverting to the phone number entered.
(32)12345 This is the default security code.

Sunday, March 28, 2010

How do you Find your computer serial number?


There should be a manufacturer label on back or side of your computer (or bottom in case of a laptop), this should have the serial number information which helps the manufacturer track information about its production and sale. Typically it will have "S/N:" before the start of serial number. It is different from the operating system license number or product key which is on computers with Microsoft Windows.

Department of posts to distribute new pension system

The Department of Posts, Government of India, has been enlisted as a Point of Presence (PoP) for distribution of the New Pension System (NPS) by Pension Fund Regulatory & Development Authority (PFRDA). The Department of Posts (DOP) would, to start with, make the NPS available at over 800 of its branches all over the country, and expand the distribution network to more branches in a phased manner in its endeavour to make NPS available to all citizens in all parts of the country. Both PFRDA and the Department of Posts see significant potential and synergy in this partnership for the development of the NPS and believe that it will significantly further and promote the Government’s initiative to provide old age income security to all citizens of India.
NPS is currently being distributed by 21 entities through nearly 800 branches spread all over the country. PFRDA is working with these institutions to bring all their branches under NPS in a time-bound manner. NPS will now be sold through over 1600 outlets of DOP and other entities.
PFRDA is also considering proposals from other entities seeking authorization to act as a PoP. PFRDA has accorded over-riding priority to expansion of NPS distribution network in its effort to make NPS available within the easy reach of all citizens.

How to Break a BIOS Password ?


Break BIOS Password for Desktop :
If it's a desktop PC, erasing the cmos memory will usually clear it.
Steps:
1. Power off the computer and make sure that it is unplugged.
2. Open up your computer case. You need physical access to the motherboard to complete this procedure.
3. Find a circular, (mostly) silver metallic object on the motherboard. This is the CMOS battery.
4. CAREFULLY remove the CMOS battery and leave it out for about 120- 180 seconds. This will flush the CMOS memory which stores the BIOS password and all other configuration. (See Warnings)
5. Set the battery back into place and power on the computer.
6. The computer should then warn you that the CMOS configuration could not be found. You can either reconfigure it yourself or restore defaults. Restoring the default configuration should be fine.
7. You will notice that the BIOS password has been cleared and you can boot without it. You may reset the BIOS password to something else by going into the BIOS configuration and setting a new User Password.
Alternate Methos: (More Dificult)
Remove a jumper: There's a jumper on your motherboard that you'll need to identify and remove. Most motherboards make your job easier by actually labeling the correct jumper as "BIOS config" or something similar. (it looks like a small plastic thingy on 2 pins with 1 pin beside it, within a 1" of the battery). If you're having trouble looking for it, look in the motherboard manual.After you have found it, carefuly pull straight up on it, and place it on the 2-3 pins(it was on the 1-2 pins). With the battery removed and the jumper moved, turn the computer on, and check to see if you can get into the bios. If you are able to, turn the computer off, put the jumper back on pins 1-2, and put the battery back in. Lastly put the case together and you are done.
Note: Don't forget to configure the BIOS (if you know how) after this process. If you you don't know how, just hold the "delete" button when starting your PC and when the blue screen appears, find the load safe defaults settings and press:
* ENTER button
* Y button
* F10 button
Break BIOS Password for Laptop :
Remember that laptops can be trickier, especially if it's a newer model. If it has a security chip on the motherboard forget about it. You either have to physically remove the chip or contact the mfg for the "master" password. If you can boot up off of a cd or floppy try any of these methods:
1. Create a Win98SE bootable media "or anything that lets you boot into MS-DOS" and boot off of it.
2. When the A:\> prompt appears type debug and press enter.
3. You will then only see a "-".
4. Type o 70 2E "include the spaces" and press Enter.
5. Type o 71 ff "include the spaces" and press Enter.
6. Type q and press Enter.
7. Here are a list of common mfg backdoor passwords
* AWARD BIOS
AWARD SW, AWARD_SW, Award SW, AWARD PW, _award, awkward, J64, j256, j262, j332, j322, 01322222, 589589, 589721, 595595, 598598, HLT, SER, SKY_FOX, aLLy, aLLY, Condo, CONCAT, TTPTHA, aPAf, HLT, KDD, ZBAAACA, ZAAADA, ZJAAADC,
* AMI BIOS
AMI, A.M.I., AMI SW, AMI_SW, BIOS, PASSWORD, HEWITT RAND, Oder

Thursday, March 25, 2010

Difference between WindowsXP and WindowsVista


The visual differences between XP and Vista are large in some areas, and small in others.
As for the technical part of it, it is the same thing; large differences in some areas, and small in others.
Overall, XP is more reliable, more user friendly, and has been around for a while so it has a large user base that can answer most questions about Windows. XP is also more compatible with printers, copiers, etc. XP also does not have User Account Control (UAC) which is a pain in the butt for Vista users. UAC asks you a question every time you do something, literally. For example, if you move something in the Start Menu, UAC will come up in a dialog box which takes you out of you work environment and says "Do you want to move this over there?" Basically, if you do something, Vista will ask you if you want to do it.
Vista on the other hand, has Direct X 10, which allows you to have more sophisticated graphics in games. Vista's desktop is graphically enhanced with 3D technology, which is basically the largest advantage that Vista has over XP. Vista has some minor advantages like faster loading of the Start Menu and quicker booting and shutdown.
If you must choose between the two, XP is the one to go with, for now. It is generally better, in all areas. If you want Vista for the looks, you should know better. Just like you should not judge a book by its cover
Windows XP was released in 2001. Windows Vista was released in 2007. Vista is new, and therefore is not as stable at this point. Windows XP has less features, but with the upcoming release of SP3, it will be very stable and secure.
Many people are not upgrading to Vista because of the performance impact of the new UI and the instability of it thus far. Wait until SP1 is released later this year if you are considering purchasing it.
As an authorized Microsoft Beta Tester for both products, I can honestly say that the difference is like putting lipstick on a pig. However I think the question you were really asking is should you buy Vista now or stick with XP. The answer goes as follows:
Wait for Vista Service PAC 109 to arrive before purchasing the original. Of course I'm being silly, but a thorough review of the history of the Microsoft OS products will prove my assertion to be true. Buy a US Savings Bond instead and wait it out.
Windows vista has lots of new stuff like aero view. It also has a new look. While Vista looks good it has very high system requirements and many of the older systems find it hard to deal with the high demand Vista requires of them, thus while it gives you a better look and infinitely more driver and options it does take a high performance system to get the best out of Vista. The biggest difference between Vista, XP and Linux is Vista's access and security, offering you a lot more options in securing your data and computer from other users. Visually Vista is also more user friendly displaying more information on the screen than ever before. Many users can access a single document from various system at the same time.

Wednesday, March 24, 2010

Speed Up a Very Slow Computer Shutdown


Tips to speed up very slow computer shutdown
Tip1: Cut down of the programs and processes running in the backgroun
d.
When you start your computer many unnecessary processes are loaded. You can eliminate this by managing your msconfig.
Here is how:
1. Open your Start menu.
2. Click Run
3. In the command screen type "msconfig.exe"
4. In the system configuration utility,click either service or startup tab.
5. Uncheck all programs that your are no longer want to run in the background.
6. Click OK
Tip 2: Clean your Registry
Usually slow computer shutdown often occurs due to a corrupted registry. You should perform a Scan Of Your Registry. If you receive more than 30 errors, this is the reason why you have slowdown.
Tip 3: Defrag your Computer
The faster your computer can find files the quicker it can shutdown. A very slow computer shutdown can be the result of your hard drive trying to search for disorganized and fragmented files that it needs for shutdown . Organize your hard drive by performing a defragmentation.
Here is how:
1. Open the Start Menu
2. Click on My Computer
3. Right Click your C: drive or your hard drive image.
4. Scroll down to the Properties and Click
5. In the Properties Menus, Open the Tools menu.
6. Choose Defragment Now.
7. In the Disk Deframenter menu. Click on Defragment
Tip 4: Alter your Paging File Settings
The paging file (Pagefile.sys) is a hidden file on your computer's hard disk that Windows XP uses as if it were random access memory (RAM). Therefore this file can be huge. On shutdown it must be cleared. This can cause very slow computer shutdown. We can avoid this by instructing our computer to not close this file during shutdown.Warning this a a dangerous tip because you to edit your manually registry. This can cause serious damage. A registry cleaner may be able to perform this function for you
Here is how:
1. Click Start
2. Click Run
3. Type regedit.exe
4. Find the folder: HKEY_LOCAL_MACHINESystemCurrentControlSetControlSession ManagerMemory
5. At this point you will see a list of files, Double click on Clear Page File At Shutdown
6. Change the value of the paging file to "0"
Tip 5: Check Your Device Drivers
When your computer shutdown, the operating system must disengage from all your hardware devices. This action allows the devices to power off. If the device has error or cannot be find the device, Windows will have a very slow shutdown or even hang forever. Updating the driver or troubleshooting it may eliminate this problem.Check your device drivers for any errors which are indicated by an yellow exclamation mark or an X. Following the below instructions to evaluate the driver::
1.Click “Start”
2.Click “Control Panel”
3.Click “System”
4.In the System menu, click the “hardware” tab
5.Click Device Manager to bring up a full list of installed
hardware drivers.
6.Right click and choose “Properties” to evaluate the status and troubleshoot the hardware device.
At this point, you can either delete the driver or update it. If you choose to delete the driver, when you restart your computer, Windows will search for a driver to replace it. It may replace it with a more suitable driver or request that you download a new one.

Remove XP’s Build-in CD Burning Capabilities


This registry hack will remove Windows XP’s build-in CD Burning capabilities, and let you remove all features in Windows Explorer that allows you to use a CD writer.
Start the Registry Editor
Go to HKEY_CURRENT_USER \ Software \ Microsoft \ Windows \ CurrentVersion \ Policies \ Explorer
From the menu select Edit > New > DWORD Value
Name the new value NoCDBurning
Right-click the NoCDBurning value and choose Modify
In the Value Data: box enter 1
Exit the registry editor
Log off, or restart Windows for the changes to take effect
To reverse, just delete the new NoCDBurning value.
Note: This setting does not prevent users from using third-party applications to create or modify CDs using a CD writer.

Prevent Writing to USB Storage Devices


It is too easy for users to connect a device (USB-key or MP3 player) to the USB port of a computer, and copy things off the system. This is an obvious security risk. This has been addressed in Service Pack 2 for Windows XP. You have to manually add the following registry key:
Start the Registry Editor(Start-->Run-->regedit)
Go to the HKEY_LOCAL_MACHINE \ SYSTEM \ CurrentControlSet \ Control key
If there is no key called StorageDevicePolicies, create it. You do this by right-clicking the HKEY_LOCAL_MACHINE \ SYSTEM \ CurrentControlSet \ Control key, and selecting New > Key from the menu.
Select the StorageDevicePolicies key
From the menu select Edit > New > DWORD Value
Name the new value WriteProtect
Right-click the WriteProtect value and choose Modify
In the Value Data: box enter 1
Exit the registry editor, and restart your computer
To reverse, just delete the new WriteProtect value (or set the value to 0) and restart the computer.
Note: works on Windows XP Service Pack 2 only!

Sunday, March 21, 2010

Correcting System Hang at Startup


If your system hangs about 2 or 3 minutes at startup, where you can't access the Start button or the Taskbar, it may be due to one specific service (Background Intelligent Transfer) running in the background. Microsoft put out a patch for this but it didn't work for me. Here's what you do:
1. Click on Start/Run, type 'msconfig', then click 'OK'.
2. Go to the 'Services' tab, find the 'Background Intelligent Transfer' service, disable it, apply the changes & reboot.
This problem with the Background Intelligent Transfer Service should have been corrected in Windows update Q 314862, part of Service Pack 1.

Saturday, March 20, 2010

Analysis of IMEI numbers of Mobile Phone


All mobile phones are assigned a unique 15 digit IMEI code upon production.IMEI stands for International Mobile Equipment Identity. Below you can check all known information regarding manufacturer, model type, and country of approval of a handset.
Tip! The IMEI can be displayed on most mobile handsets by dialling *#06#. Otherwise check the compliance plate under the battery.
Click here to analise your IMEI number

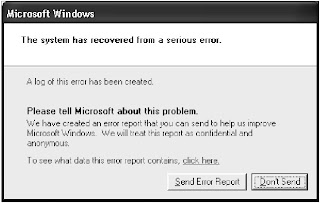
Stop Error Reporting


Every time a program shuts down and XP wants to send the error report to Microsoft.
Here’s how you stop it from coming back over and over again.
Go to Control Panel, System, click on the Advanced tab, then click on the Error Reporting button at the bottom
Put the circle in for Disable Error Reporting. If you still want to be notified that a program will be shutting down from an error, the you can put the Check IN the box for ‘But notify me when critical errors occur’

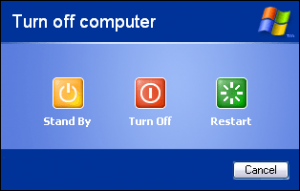
Shutdown/Reset with one click


You can shut down Windows with just one click of an icon on your desktop…or reset the same way
Right click on a blank area on the desktop
Click on New, then Shortcut
Type this: shutdown -s -t 00
(those are zero’s not the letter)
Click Next, then give it a name, such as Shutdown, then click on Finish
For a Reset button
Do the same thing only type: shutdown -r -t 00
Then give it the name Reset
Now…those icons look ugly…change them too
Right click on the first icon you just created, click on Properties, click on Change Icon (you’ll probably get a message…just click on OK), then find a different icon to use and double click on it. Then click on OK. Then change the other icon (if you create 2 of them)

Robo Copy


Robocopy is a small software which is helpful for shedule syncronisation of mdb files.
Click here to download Robocopy